Computer & Electronic Lucite
Promotional Items

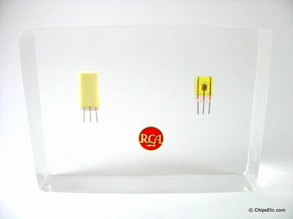
RCA Germanium TV transistors from 1953
Acrylic (Lucite) display items became a new way to promote and advertise the latest electronic & semiconductor technology components starting back in the early 1950's with the promotion of the earliest available commercial transistors. One of the oldest items in our collection (image to the right) is an RCA "Germanium Television Transistors" paperweight dating back to 1953.
Samples of actual computer & electronic components encased in Lucite were an ideal way for a company salesperson to show off their new products to potential clients. Sometimes these items were made specifically for a company to give out as gifts to employees to commemorate a new product release, important milestone or anniversary date.
Acrylic items were also made as limited edition souvenirs given out to the General Public that were attending Specialized Events, trade shows and Promotions.
Acrylic display items with technology items embedded in them have since been produced in numerous forms such as paperweights, keychains, awards, ashtrays, and plaques.
How Lucite Paperweights
with Embedments are made

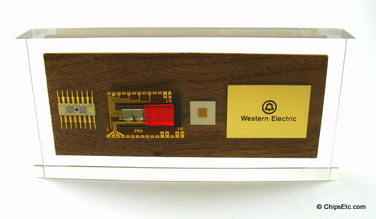
Western Electric Lucite Paperweight with many Embedments
Embedding objects in plastic resin involves making a casting of two or more layers with the objects sandwiched between the layers. Generally, you work in reverse when embedding objects. (It is like making an upside down cake.)
The first layer you pour becomes the top or face of your casting. Pour the first layer of catalyzed resin into mold and allow the resin to gel until firm enough to support the embedments, approx. (20-30 minutes) or use Gel Promoter to gel the resin in as little as 90 seconds.
Prepare the next batch of resin and stir. To avoid trapping air, dip embedments into the catalyzed resin; set in place face down on the first gelled layer. Pour balance of catalyzed resin over the embedments.
If the embedments are not yet covered or if you want a colored background, pour a third clear or colored layer after the second layer has gelled. Embedments can be placed in several levels to create a "floating" appearance.
After final layer has been poured, allow casting to harden completely before removing from the mold.
