Removing Light Scratches in Lucite & Acrylic Plastic
|
|
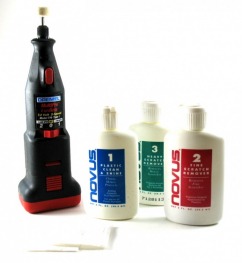 NOVUS Polishing System w/ Dremel Tool
We recommend the Novus polishing system for removing light to medium scratches in Acrylic items.
Novus has a 3-step program for polishing depending on how deep the scratches are on your item. If the scratch is so deep that it catches your fingernail then you will need to start out with Novus #3. If Novus #3 is unable to remove the scratches then wet sanding and polishing will be required. There are many other brands available that will get similar results.(Meguiar's Plastx Plastic Cleaner & Polish, Mothers Plastic Polish, Janvil Light or Heavy Duty Scratch Remover)  Dremel Tool Polishing Accessory Kit |
The 3 step Novus Plastic Polishing Procedure
Novus #1 - Plastic Clean And Shine
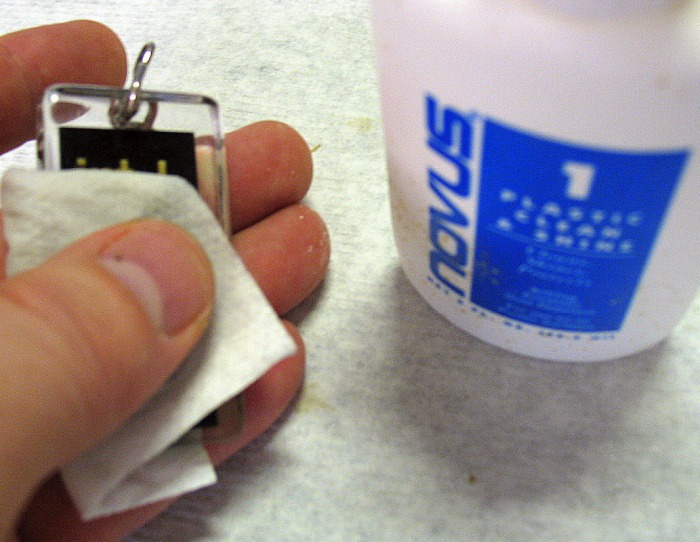
Novus #1 used to clean item by hand with a soft cloth
Gently cleans all plastics without scratching. Leaves a lustrous shine that resists fogging, repels dust, and eliminates static.
- Resists finger marking
- Contains no abrasives or harsh chemicals
- Leaves a smooth, clean, greaseless shine
- If the surface is extremely dirty, apply NOVUS No. 1 liberally and wipe using long, sweeping strokes. Do not use pressure at this time or large dirt particles may scratch the plastic.
- Re-apply NOVUS No. 1. Polish using short, circular strokes with a clean portion of the cloth.
- When surface is thoroughly clean and uniformly covered, buff to a slippery glaze with a clean portion of the cloth. Surfaces buffed to a high glaze are more resistant to dust and future scratching.
- Reapply NOVUS No. 1 regularly to maintain the antistatic, smudge and scratch resistant properties.
|
|
|
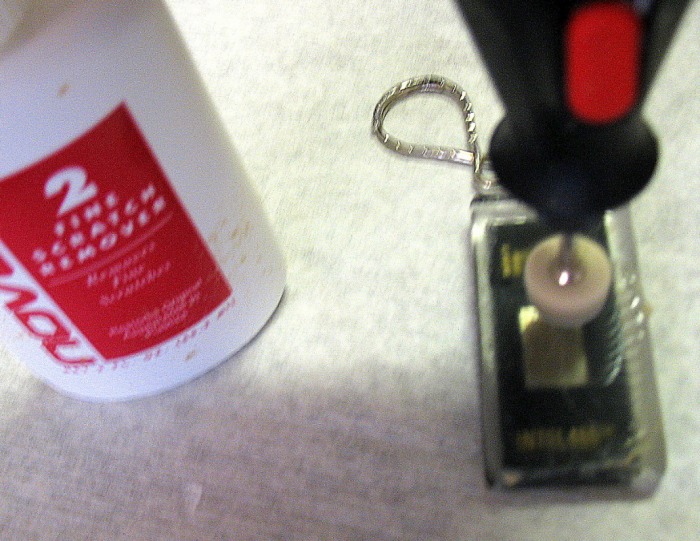
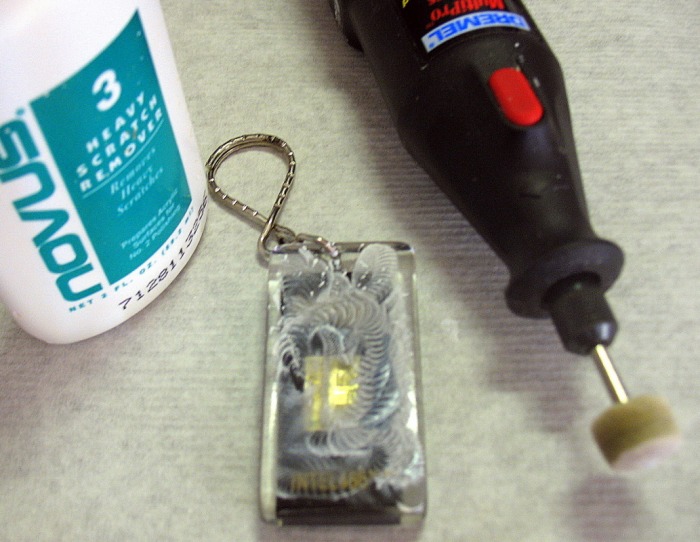
Novus #3 - Heavy Scratch Remover
Novus #3 Polishing with a felt buffing wheel on a Dremel Tool
Removes heavy scratches and abrasions from most acrylic plastic surfaces. Use when damage is too severe to be restored with NOVUS No. 2 polish.
- Requires use of NOVUS No. 2 for final finishing
- Not recommended for use on coated plastics
- Shake well. Test in an inconspicuous area.
- Apply NOVUS No. 3 liberally. Using a clean, soft cloth, polish with a firm back-and-forth motion at right angles to the scratches. Keep the cloth saturated with polish at all times.
- Continue polishing until only fine scratches remain. Using cloth, remove all remaining polish, this is very important!
- Using a clean cloth, apply NOVUS No. 2 in a circular motion uniformly to entire surface. Polish using light pressure until NOVUS No. 2 dries to a light haze.
- Using a clean portion of the cloth, buff the surface clean. Follow with NOVUS No. 1 for best results.